Quake
II Strategies
(By Wisdom)
________
Q2DM1 Strategy Guide
By Wisdom
If you haven't heard the
name "Quake II" before, then this strategy guide is not for you in fact, this
whole gaming section is probably out of your area of taste. If you've only heard about the
game and are wondering if it's the type for you, then be patient because my Quake II
review isn't off the press just yet. Bear with me, folks! But, if you happen to fall
somewhere in between semi-frequent and die-hard Quake II-er, then you might be interested
in reading muh lil' strategy guide to the map q2dm1, AKA The Edge. If you're a seasoned
player, in all likelihood I'll be repeating what your Quakin' mind already knows but skim
through it and maybe you'll find something new to test out on some unsuspecting newbie
(psst! feel free to e-mail to me any added tips/tricks). If you are an unsuspecting
newbie, then consider the following to be your Q2dm1 Bible. Lastly, if you're like
me-somewhere in the middle like Rice's "plain old vanilla"-then this could be
helpful in bringing your game to the next level. But whether you're an owner or ownee (for
the Quake illiterate, the word "own" is a pretentious and derogatory statement
used by players who have just fragged the living daylights out of another; the word
"frag" is equivalent to "kill."), I believe the guide will help you
understand and enjoy the game more.
P.S.- Comments are welcomed. Keep in mind that this is my very first stab. ^_^
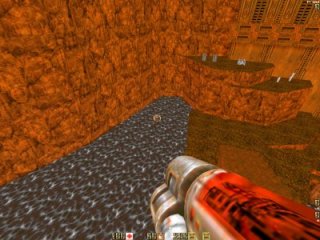
THE EDGE
This map is THE most popular of all maps for 1 on 1 duels and small
teamplay clashes. The reasons why are simple-players have access to all of the weapons
(other than the cheezy BFG that fires the cheezy, but effective, fuzzy green ball of
death). There are two types of armor (one gray and two yellow), which are nicely located
throughout the level. There is a megahealth and yellow armor in a single room that often
helps to balance against the player that has the weapons from the other parts of the
level. Armor shards and health packs are placed in such a way that when a player obtains
one or the other, they give the other player a good indication of their location on the
map. The hallways and rooms are designed and linked in such a way that a player can easily
hunt another. Likewise, the added elevator and the extra rocket launcher gives the hunted
a chance to escape and grow stronger.
Sounds:
The sounds that both you and your opponent make are vital to winning
the game. They of course give off location. But they also help to give you an idea of what
kind of weapons and what kind of status your opponent has. For instance, if you hear the
megahealth and armor being grabbed, you know your opponent now has an extra 100 health and
50 yellow armor. The following information will help you become better at hunting,
hoarding, and-let's not forget-fleeing!
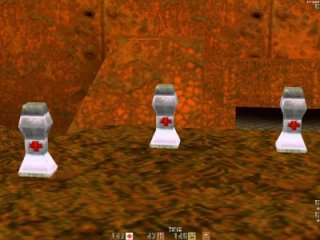
- Health Packs
 |
2
Health |
 |
10
Health |
 |
25
Health |
Health packs make different
sounds depending on whether they give you 2, 10, or 25 healths. Learn the distinctions. In
The Edge, there is only one location where there are 2 healths (right outside the tunnel).
DO NOT grab them. Eight health is hardly worth giving off your location. If your opponent
does grab them, you know they're going to the tunnel, the railgun, or up the stairs
towards the room. Read on to learn how to tell if one goes through the tunnel or to the
railgun.
The 10 healths come in pairs. There are only 3 pairs located in the level: the stairs
above the chaingun, the hallway leading to the upper rocket launcher, the hallway leading
to the hole that drops you to the lower rocket launcher. To distinguish which set your
opponent has grabbed, use both your eyes and your ears. Listen for sounds before and after
the health sounds to determine the general vicinity that contains those items. Look at
possible places where your opponent would have to appear to deduce his location.
There are four 25 health packs in the level, with 2 of them making a
pair. The pair is located on a ledge near the super shotgun, while the remaining two are
split between the hallway of the lower rocket launcher and the platform of the grenade
launcher. Use the same strategies as with the 10 health packs to intercept your opponent.
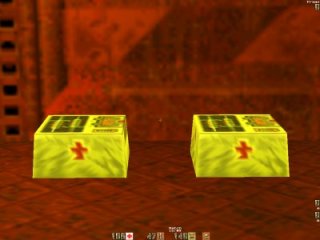
- Weapons, Ammo Packs, and Armor Shards
Weapons, ammo packs, and armor shards are important as well. In the
level, there are only two sets that contain a weapon with 2 packs: the super shotgun +
shells and the lower rocket launcher + rockets. Thus, when you hear a weapon being grabbed
with 2 ammo packs, then you've narrowed down your opponent's location to two
possibilities. The chaingun, however is with 3 ammo packs, so if you hear a weapon being
grabbed followed by the sounds 3 ammo packs, then you know that your opponent is in the
megahealth room with a chaingun.
I have used this trick that has fooled one of the top players in the
world. Although in the end I got my ass handed back to me, I was still proud of being able
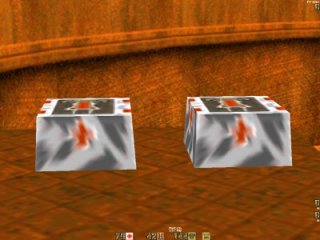
to trick the guy. Near the lower rocket launcher, there is a shotgun with 2 bullet packs.
I grabbed those items on purpose and this gave the illusion that I was in the lower rocket
launcher, which prompted my opponent to attack that vicinity, while I sneaked away.
 |
Shotgun
to the left, bullet packs to the right |
- Railgun and Tunnel
When people go into the water to fetch themselves a railgun, you can
more than often hear a soft water sound being made. However, there is a trick that makes
it so that when you do go into the water, no sound is made whatsoever. This can be
accomplished by jumping into the water by jumping against the tall wall of the platform
that holds the upper rocket launcher. If you just finished killing someone, and you don't
hear or see much for a good amount of time, it is very likely that the person is getting
the railgun.
The tunnel involves two consecutive louder water sounds. The fact that
it has two sounds at its entrance makes it easily distinguishable from the water of the
railgun. Listen for either water sounds to pinpoint their location.
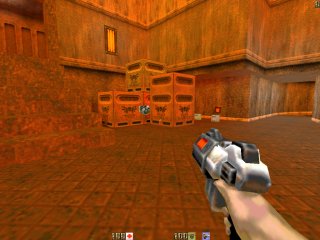
Little Tips and Tricks:
1.) If you happen to be near or at the megahealth room at the first respawn, GET THE
MEGAHEALTH. I have seen many players just grab the armor and then immediately head for the
lower rocket launcher. This is a big mistake because your opponent most probably spawned
closer to the rocket launcher, and he would simply head up the elevator, go into the room,
and take the megahealth-while you're running around weaponless and megahealthless. So,
take the megahealth and yellow armor. Afterwards, listen for your opponent's sounds. If
you hear the elevator and armor being grabbed, then run out of the room. If you hear him
coming out of the water, attack him if he comes out of the stairs (if he goes under the
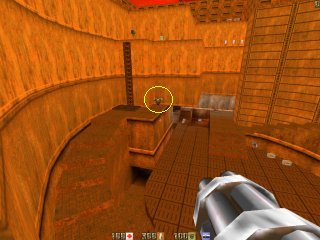
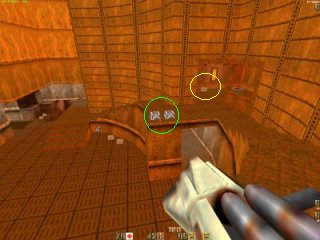
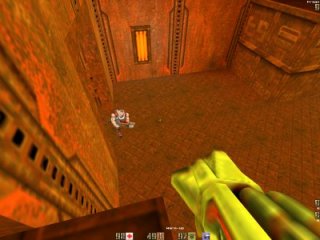
tunnel, intercept him on the other side). Another alternative is to walk out of the second
door way to try and locate your opponent. <see picture> If you see him after the
yellow armor, then the chances are he has the rocket launcher. So, then I would go get the
chaingun and see what you can do from there.
 |
Spray
him full of lead! (Yellow armor in circle) |
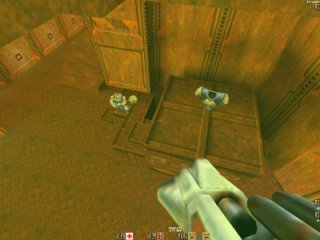
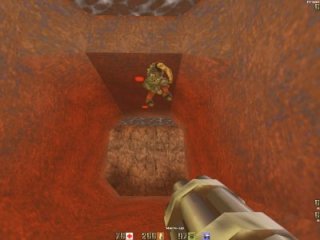
2.) If you know the opponent is coming down the
stairs after going up the elevator, hide behind the crate with the yellow armor on top of
it. Chances are that he'll go for the armor, so after you hear him jump once, rocket jump
on top of the box. You'll grab the armor, and have a good angle to get one or two rocket
hits off him before he can react. Make sure you have health and armor to spare, and of
course, a rocket launcher with rockets to spare. Oh, and don't do this too often because
you don't want him to catch on to you. Mix it in here and there to keep him guessing.
<see picture>
 |
Rocket
jumping will hurt you! To rocket jump:
Aim down and press fire & jump together |
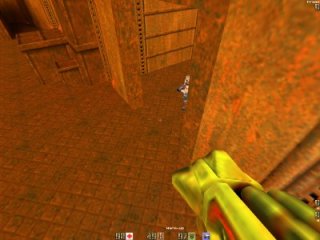
3.) Here are a couple of good spots to use the
railgun if you know where those suckers will pop up. If you have trouble predicting where
they'll show, go to the "reading sounds" section. <see pictures>
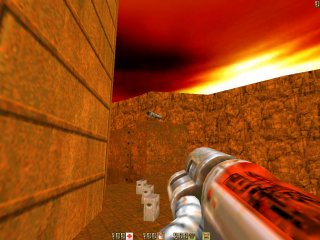 |
When
you hear the armor shards leading
up to the upper RL |
 |
When
you hear the RL and Rockets being
grabbed. (Lower RL in circle) |
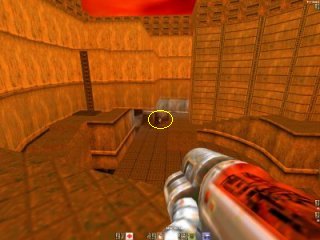
4.) When you hear the armor shards leading to
the upper rocket launcher being grabbed, you can remain in the room behind the doorway
with a chaingun. <see picture> If you hear the weapon being grabbed, and then
immediately hear some ammo packs being grabbed after, they are very likely heading towards
the room. You then start up your chaingun and charge at em. You should have enough armor
and health to take a rocket from them. They will 1.) Run away or at you and get killed in
the process; 2.) Escape with very, very little health and no armor whatsoever; 3.) Fall
off the ledge, in which case you could use a grenade launcher or rocket launcher with
confidence.
 |
Charge and spray lead!! (Upper RL in circle) |
5.) If your opponent has gone into the tunnel
from the railgun side, go to the end of the tunnel, and from the ledge at the doorway to
the room, start plunking grenades into the tunnel. This will discourage them from coming
out, and may even do some damage. When you hear a water sound, go to the other side with a
rocket launcher/chaingun and finish the job. Do this like a cat and mouse game until you
finally get then. If you know they're low on health, you could also jump down and surprise
them.
6.) If you're playing against an LPB (low ping bitch/bastard) as an HPB (high ping
bitch/bastard), avoid open spaces, and know where your opponent is at ALL times. You don't
want to be surprised by a railgun slug, or to be lagged to death in an open battle. Hit
and run, and follow through with a fight only if you have the advantage in position,
health, and protection.
7.) To improve both aim and FPS, center your weapon view. Use the command line "set
hand 2." (exclude the period ^_^)
8.) A good shortcut to the two 25-health packs near the super shotgun is to jump from
here. <see picture>
 |
Be
sure you have a running start, or you'll fall
short! (Super Shotgun in yellow circle, 25
health packs in green circle) |
9.) Never, never proceed to get the railgun
right after you've been fragged. The railgun is a trap! Go for it only if you start the
match near it, or if you just finished fragging someone near it. On the other hand, if you
hear a soft water sound, here are a few places to wait for em to pop up (mix up your
choices ^_^). <see pictures>
 |
Ha
ha! He's gonna get a cap in his ass! |
 |
You're
standing on the wall lamp, about
to land a rocket on his head |
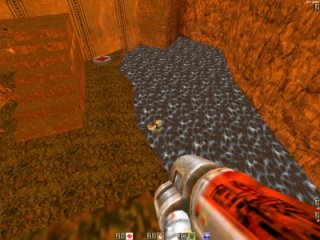 |
You're
on the protruding plateau w/ the 2
rocket packs. Rail him! |
 |
You're
on the walkway below the upper RL.
This guy just doesn't learn his lessons! |
 |
Double
jump up to the top to get a height
advantage. "Meet Mr. Rocket!" |
10.) If you have the railgun in hand and your
opponent just escaped up the elevator, aim at the grenade launcher or the armor shards.
They will go to one of those objects, or to the room. If you hear them jumping and
grabbing items that could only be from the room, then you know how to plan your next
strategy.
11.) Bind keys to drop weapons and ammo (ie: bind g "drop railgun; drop slugs").
This is essential for team games when your mates have just died and is in need of a
weapon. Also, during a duel, you can drop weapons and pick them back up to fool your
opponent about where you are.
|